
Italian Butter Cookies


These classic Italian Butter Cookies are better than the ones you love from the bakery!
This recipe will make lots of delicious cookies for you to keep or gift! Follow all of my tips for making the dough and decorating these cookies like a pro!
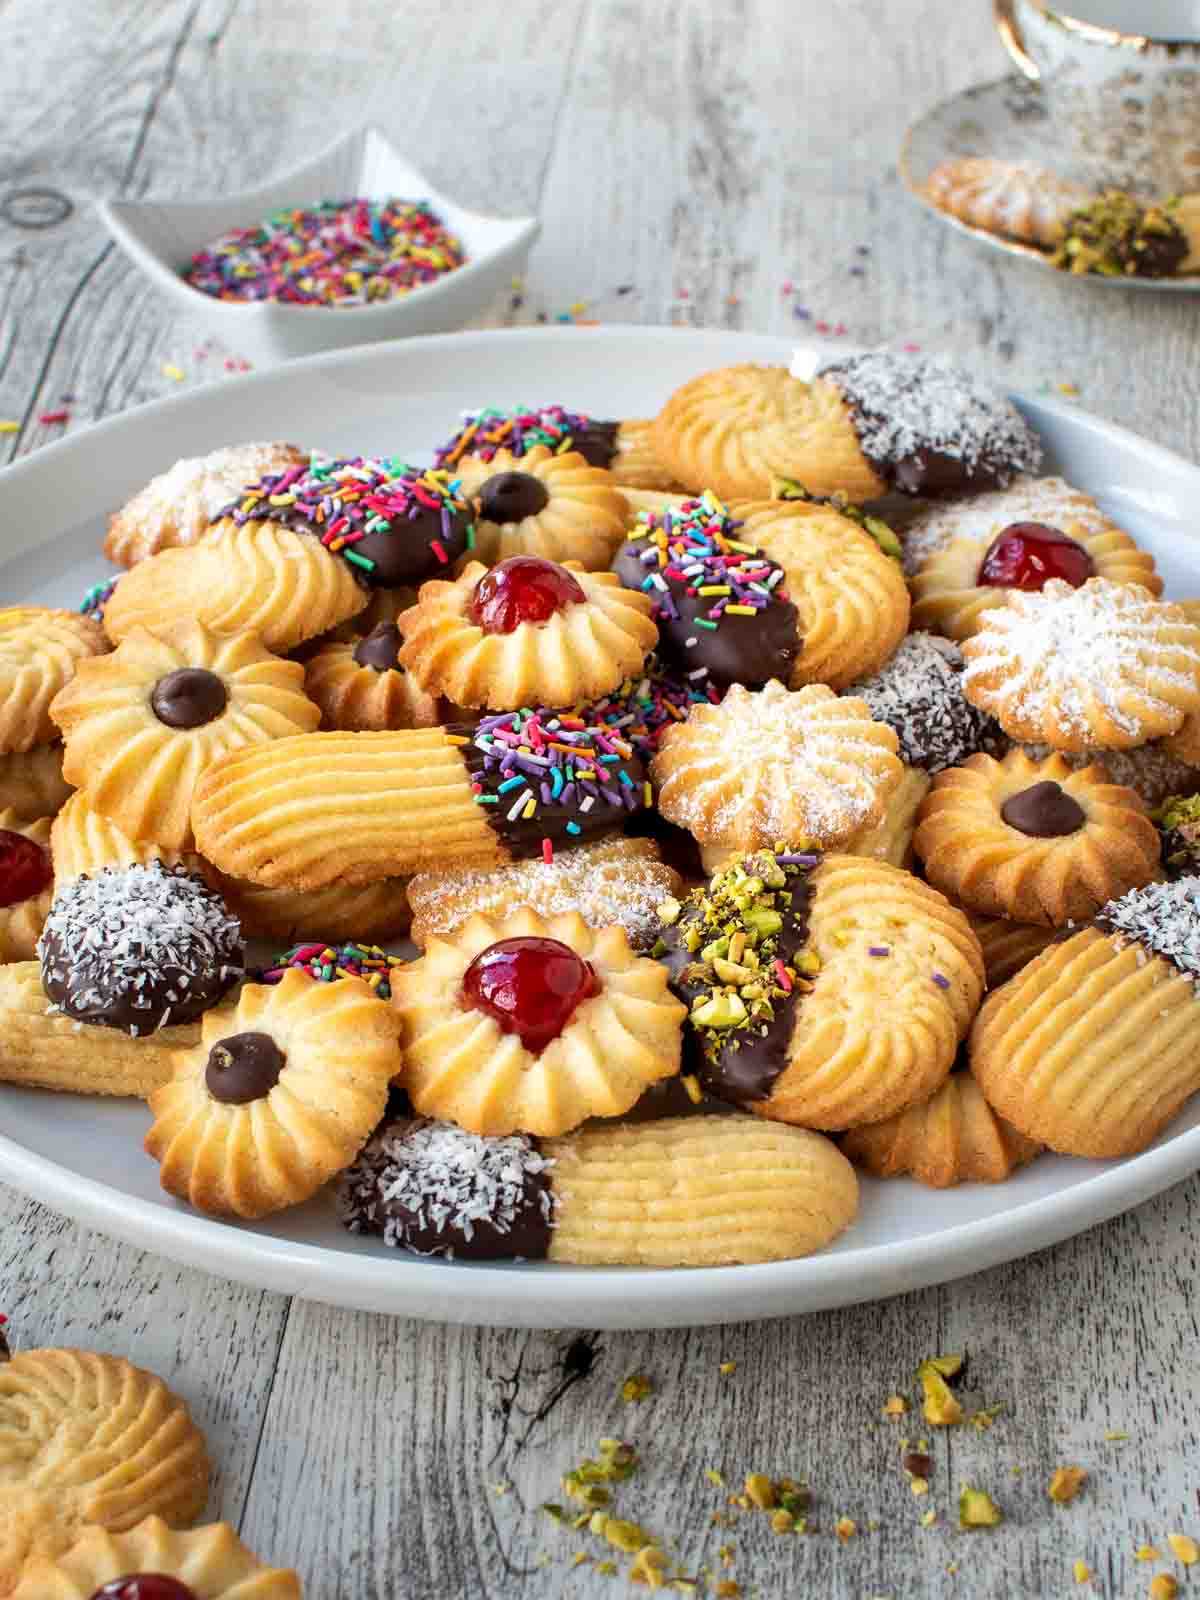
These mouthwatering Italian Butter Cookies, also known as “biscotti al burro” in Italian, are loved for their buttery flavor, delicate texture, and festive toppings. This is an Italian butter cookie recipe I’ve made many times with great success, and one that everyone loves. All my notes are listed here so that you can have success too!
While Danish bakers probably made the first butter cookie,s the tradition has now spread throughout the world. Traditional Italian Cookies are found in bakeries throughout Italy. These butter cookies are popular in Italy but also in other parts of the world, particularly in the United States.
My Italian butter cookies are wonderfully tender and melt in your mouth. You can use a piping bag and an open star tip or a cookie press to form the cookies. The choice is yours. But I’m here to guide you all the way and give you tips for creating the prettiest cookies that you’ll be so proud of!
Butter cookies vs shortbread
Butter cookies are different from shortbread in that butter cookies contain eggs or egg yolks. Shortbread never contains eggs. The other difference is the ratio of butter to flour, which is much higher in shortbread, giving it the “short” texture. Generally, butter cookies also have more sugar than shortbread.
Why you’ll love this recipe
- Simple Ingredients – You’ll have most of the ingredients at home, like flour, butter, sugar, and eggs. These cookies are also delicious without any adornment.
- Buttery Flavor – While these authentic Italian Butter Cookies use basic ingredients, the rich flavor of butter is undeniable. You’ll love that such simple cookies can taste like an indulgent treat.
- Homemade – Many bakeries make a wide range of Italian Butter Cookies and other types of cookies, but homemade butter cookies always stand out. Your family will know the love and attention that you put into making these homemade cookies.
- Variety – With just one cookie dough recipe, you can make a wide variety of cookies that taste different depending on whether they’re left plain, dipped, topped, or filled. Let your imagination run because the possibilities are endless.
- Festive Gift Giving – This is the ideal recipe for gift giving and your next Christmas cookie tray. An afternoon in the kitchen baking and decorating will result in beautiful cookies you can give to the ones you love.
For complete ingredient quantities and full instructions, please scroll to the printable recipe card at the bottom of the page.
Ingredients
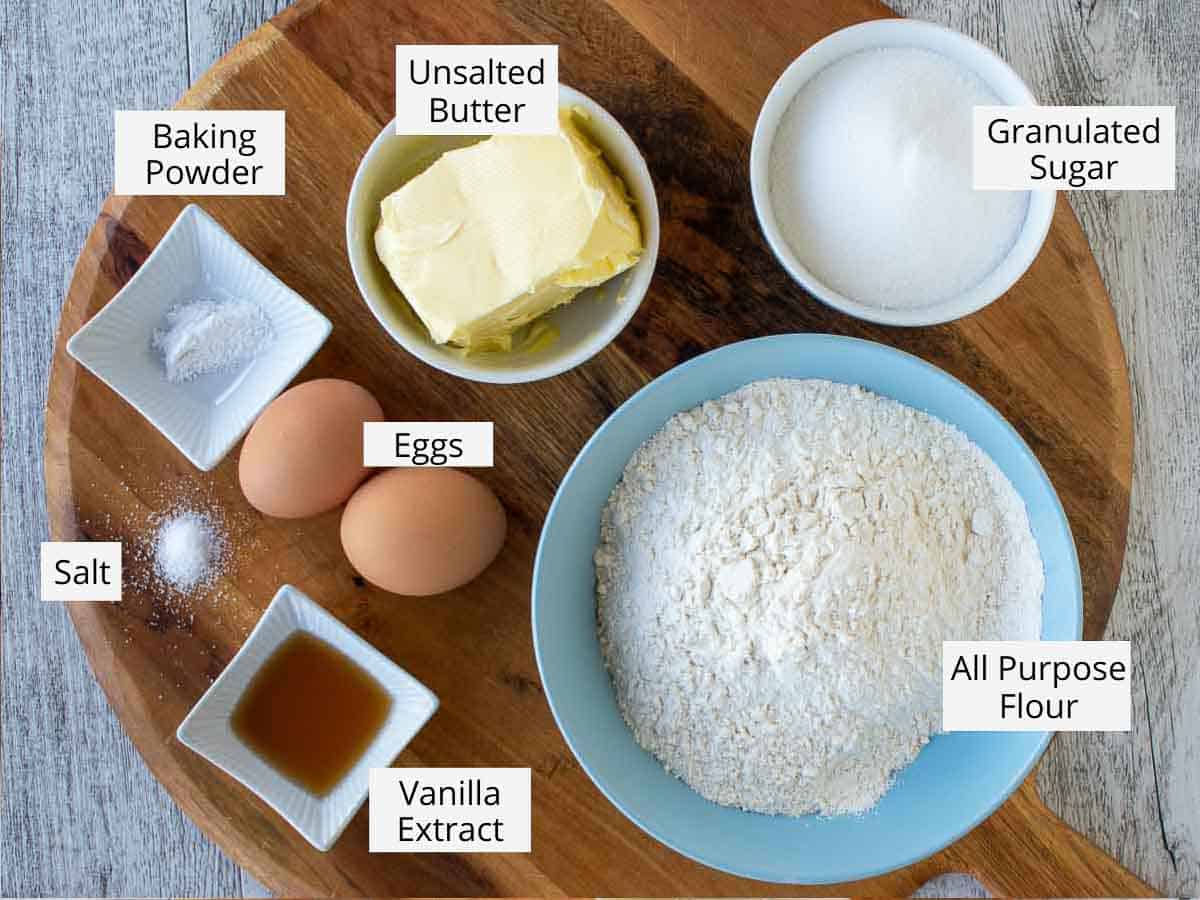
Like all good Italian recipes, this recipe uses simple, basic ingredients. Here’s what you’ll need.
- Unsalted butter – European-style unsalted butter gives the best results for butter cookies to achieve the perfect bakery butter cookie taste! I prefer to use unsalted butter in most of my baking recipes because I can adjust the salt. Use salted butter if that’s what you have, but omit the added salt.
- Granulated sugar – Regular white granulated sugar is great. If you can find superfine or castor sugar that works well in this recipe.
- Egg yolks – I use egg yolks for this recipe, which have a high fat content. This creates a smooth and velvety texture and superb flavor. Reserve one egg white to add to the dough if it’s too thick.
- Vanilla extract – Look for vanilla extract and not essence for all your baking. If you’re using vanilla essence, make the switch, and you’ll notice the difference in flavor. Plus, vanilla extract is all natural.
- Almond extract – Adding almond extract is totally optional. Some people have an aversion to the almond flavor, so leave it out. The cookies will still be amazing! Otherwise, just a little will add flavor.
- All-purpose flour – regular all-purpose flour from the supermarket is used in these cookies. You don’t need self-rising flour because there’s a little bit of baking powder included in the recipe.
- Baking powder – Make sure that your baking powder is fresh. If you haven’t used it in a year or so, buy a new box.
- Salt – just a pinch won’t make the Italian butter cookies salty, but instead bring out the buttery flavors.
See recipe card for quantities.
Instructions
Before you begin, preheat the oven to 320ºF (160ºC) and line two or three large baking sheets with parchment paper. These can also be baked at 3250ºF (180ºC). If you have added egg white, definitely bake at the higher temperature.
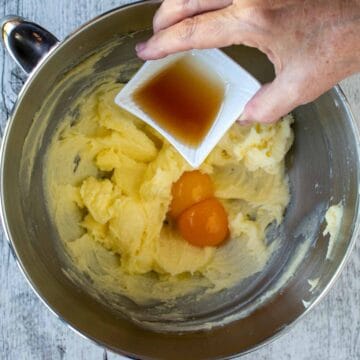
Beat together the butter and sugar. Add egg and extracts and beat to combine.
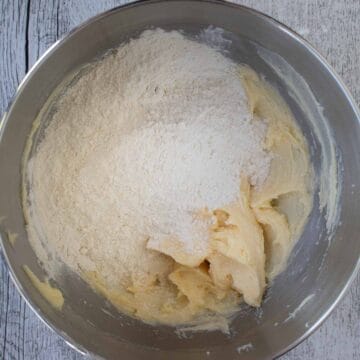
Combine the dry ingredients with the butter mixture until the dough comes together.
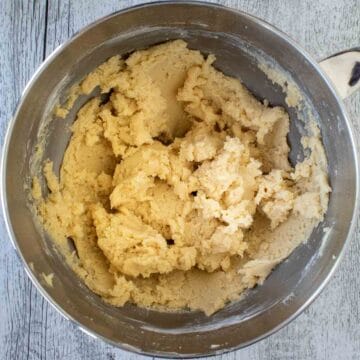
If the dough is too soft, chill for 15-20 minutes. Adjust the consistency if needed with some or all of the reserved egg white or a teaspoon of flour.
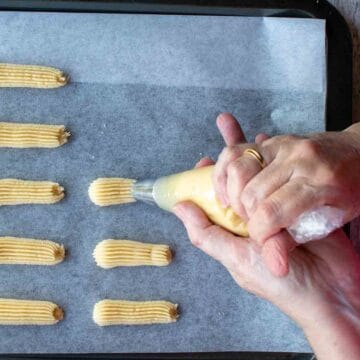
Using a piping bag with an open star nozzle attached to pipe onto lined baking sheets in various shapes.
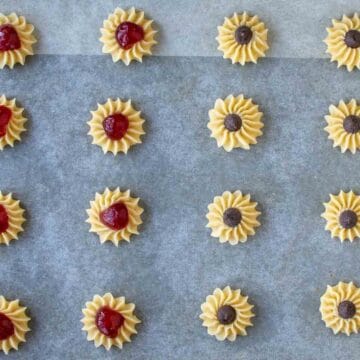
Unbaked cookies can be topped with candied cherries or chocolate. Bake light golden brown underneath.
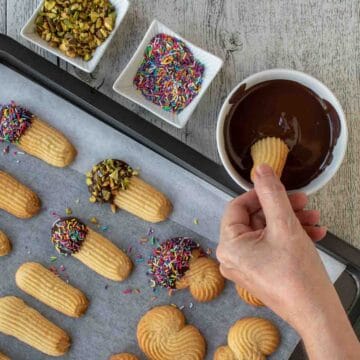
Allow them to cool completely before decorating. See below for ideas for decorating before and after baking.
If you’re not confident with your piping skills, chill the dough and use a cookie press to pipe out the dough. Chill the dough for 30 minutes before using it in a cookie press.
Marcellina’s Hint: It may take a couple of attempts to be satisfied. Any misshapen cookies can be scraped up and returned to the piping bag. If the dough becomes too warm from your hands, stop and chill it for 15-20 minutes. See FAQs below for more piping tips.
Substitutions
- Vanilla Extract – Instead, use the seeds from the insides of a split vanilla bean for an intense vanilla perfume.
- Flavorings – Omit the vanilla and the almond extract, and add finely grated lemon or orange zest to the dough.
Variations
- Chocolate cookies – Substitute ¼ cup of flour for ¼ cup cocoa powder.
- Cookie press – Instead of a piping bag, this cookie dough can be pushed through a cookie press. For the best result, chill the dough for at least 30 minutes.
- Toppings – Press a candied cherry or chocolate chip into the middle of a rosette or star cookie. Or scatter with colored sugar, sprinkles, or chopped nuts.
Cookie decorating

Decorating Italian butter cookies is the best fun. There are so many different toppings and decorations for these cookies, which are sometimes known as spritz cookies.
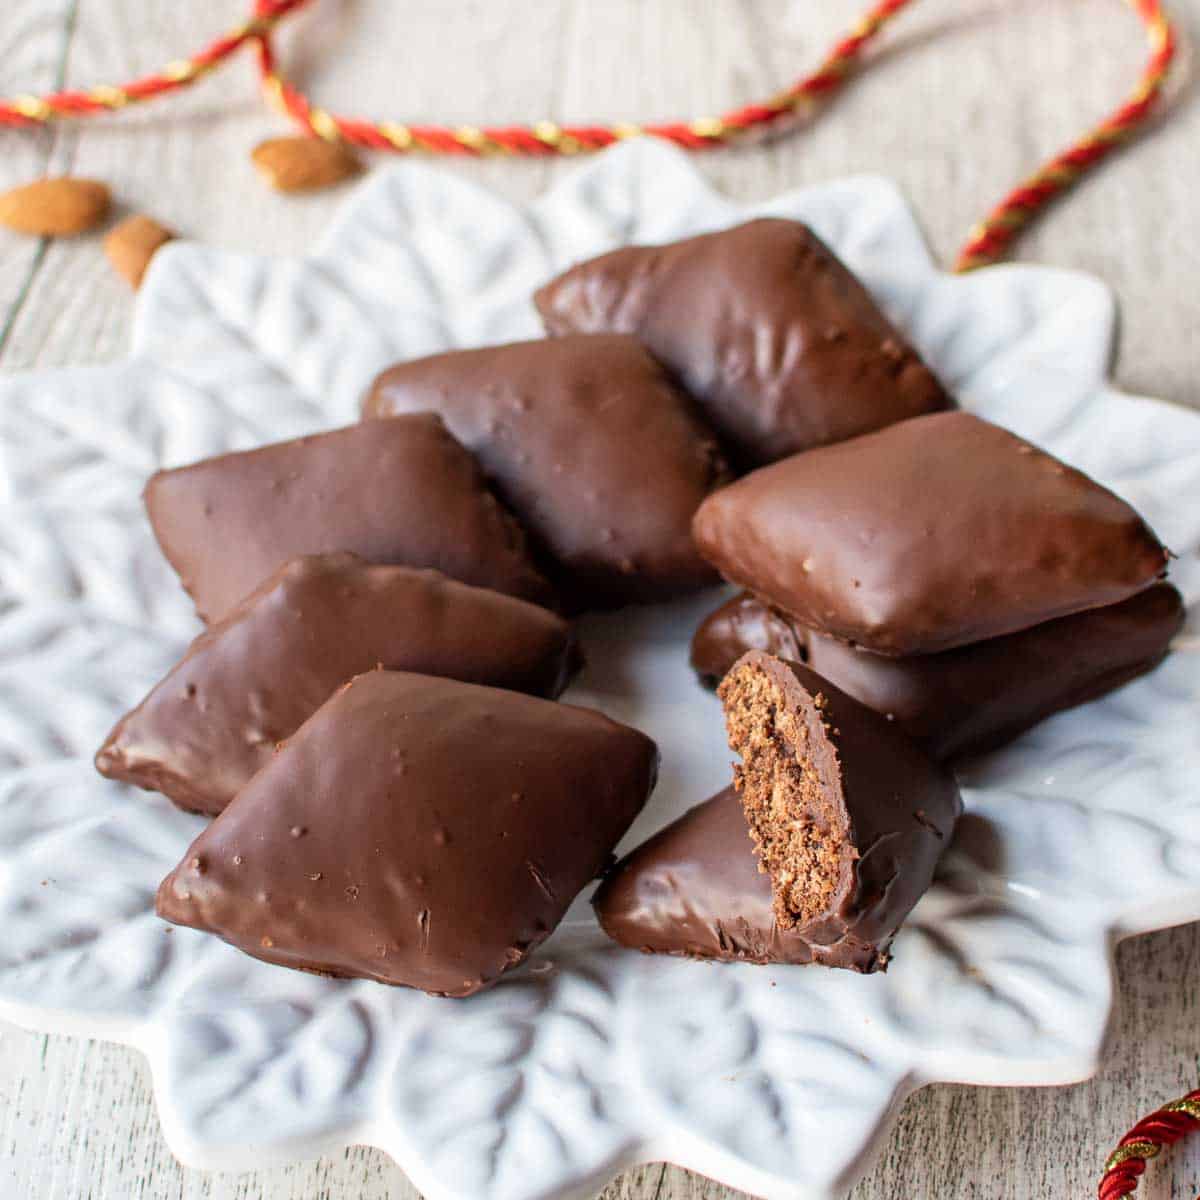
- Chocolate dipped – Dip the baked cookies into melted chocolate. You can leave them plain or dip them in chopped nuts, coconut, or colored sprinkles before the chocolate sets.
- Italian Sandwich Cookies – Join two cookies together with jam, melted chocolate, or Nutella. These can be left as is, or the cookie sandwich can be dipped in chocolate.
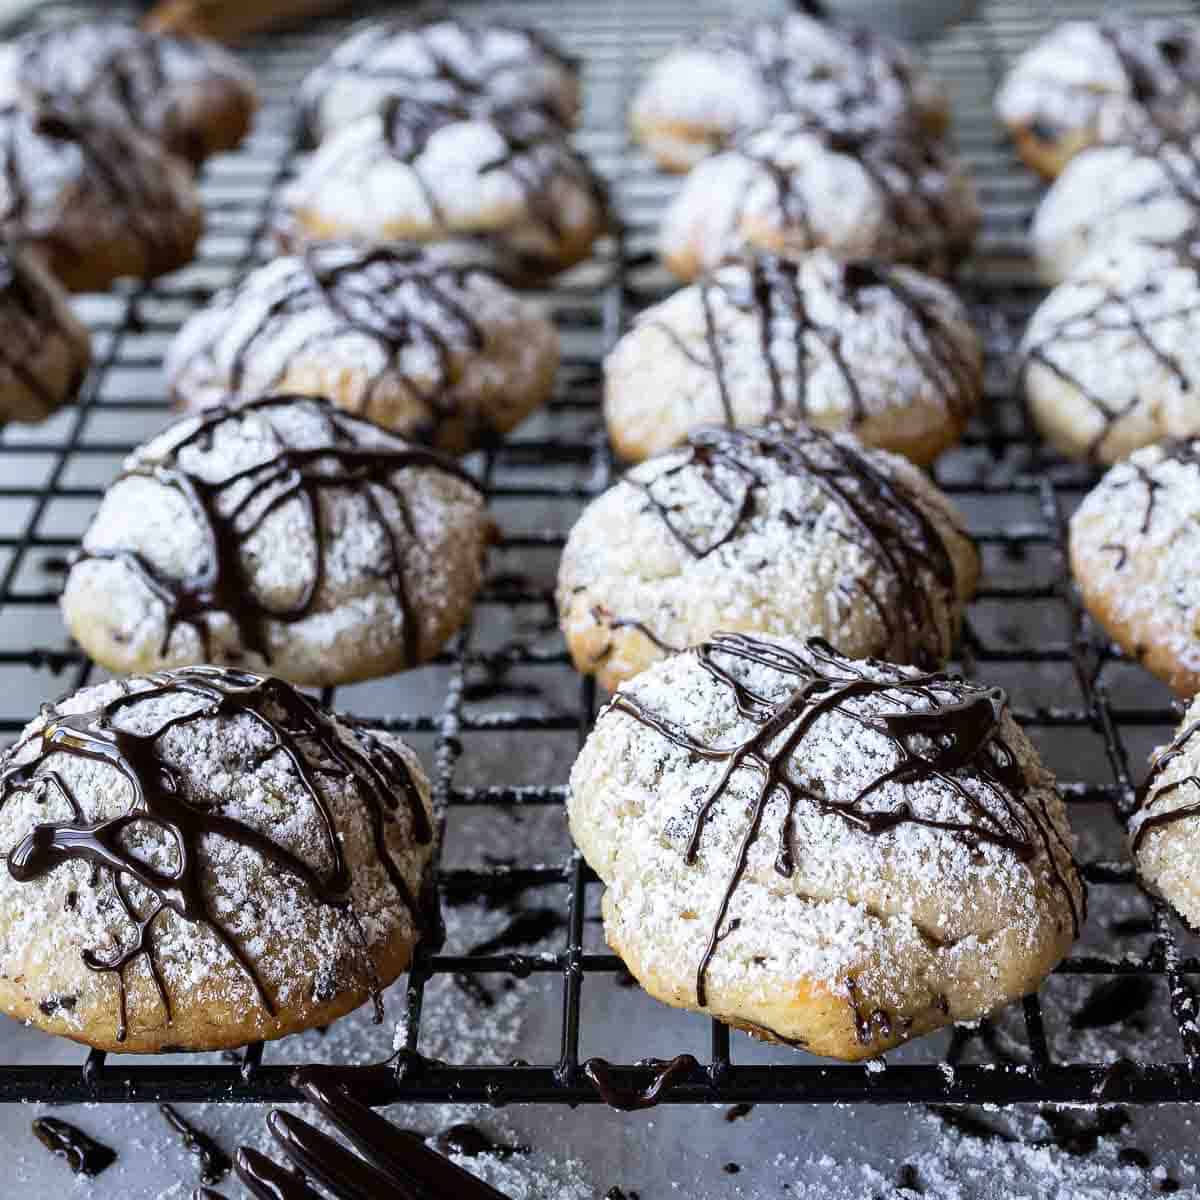
- Drizzled – Use some melted chocolate (white, milk, or dark) to drizzle over the cookies. So easy and so pretty!
- Powdered sugar – Dust with powdered sugar.
Don’t limit yourself to making these cookies at Christmas time. By decorating according to the holiday or occasion, you will be making these cookies all year round.
This dough can also be colored with food coloring. It’s best to use gel food coloring, though, because too much extra liquid will change the texture of the dough.
Equipment
Using a stand mixer or handheld electric mixer is the easiest way to make these bakery-style cookies. However, a wooden spoon and a bit of energy still make really good Italian butter cookies.
You will need the usual baking supplies of baking sheets, bowls, spoons, spatulas, and measuring cups and spoons. Plus, to pipe these cookies in the traditional way, you’ll need a large disposable piping bag and a large open star tip. Alternatively, you can use a cookie press with whichever cookie plate you like the shape of.
A cookie press is a wonderful investment. I have two. One is a beautiful vintage one, and the second I bought for about $50 in one of my local kitchen shops. However, they are widely available online. Each cookie press comes with a variety of plates that produce different shaped cookies. In no time at all, you can make heaps of cookies with a cookie press.
Storage
Allow the cookies to cool completely and for any added toppings to set, then store in an airtight container in a cool spot in the pantry for up to a week. I like to put parchment or wax paper between each layer to keep the delicate cookies from being damaged or sticking to one another. If the weather is warm, the chocolate-dipped cookies may need to be stored in the fridge.
Italian Butter Cookies can be stored for longer periods by freezing. Arrange in an airtight container with layers of parchment or wax paper in between. Freeze for up to one month.
Top tip

- Measuring – If using cups for measuring the flour, please follow these tips. First, stir the flour well so that it’s not compact. Then spoon the flour into the measuring cup; don’t dip the measuring cup into the flour. With the blunt side of a knife, level the flour off. Of course, the use of electronic scales eliminates any errors.
- Temperature – Having the ingredients for the Italian Butter Cookies at room temperature is important. This ensures that the butter and sugar blend completely and the eggs don’t cause the mixture to separate.
- Techniques – Be sure to stop and scrape down the side of the bowl regularly so all the ingredients are incorporated. Sieving or whisking the dry ingredients also helps ensure that everything is well mixed. Once the flour is added, only mix until everything is combined.
- Baking – Rotate the baking sheets halfway through the baking. You might also need to switch top to bottom depending on how your oven bakes. Bake until just pale golden on top and lightly browned underneath.
- Cooling – Be sure to let the cookies cool completely before decorating.
- Decorating – Use just a little bit of jam or chocolate when sandwiching cookies together. Too much will ooze out, and the two cookies will slip and slide. Putting the jam or the melted chocolate into a small bag and then snipping the end helps keep the mess to a minimum when filling or drizzling.
FAQ
You need a piping bag and an open star tip nozzle to pipe out this buttery dough. I like to use a disposable piping bag. Just snip off the end and slide the piping tip right down so that the tip pokes out of the hole. Fold the top edge of the bag down and spoon in about half the dough. Don’t overfill the bag.
Twist the bag just above the dough and keep twisting until the dough is pushed right into the tip. Continue to twist the bag as you pipe the cookies. Keep one hand at the top near the twisted bag and apply pressure evenly at the top to push the dough out. Use the other hand to guide and steady. I keep the bag at almost right angles to the baking sheet.
For plain, undecorated cookies or cookies with just a dusting of powdered sugar, store in an airtight container at room temperature for 5-7 days.
If you have used chocolate or ganache to decorate the cookies, allow the toppings to set completely. Putting the decorated cookies into the freezer for 5-10 minutes will make the toppings set more quickly. Then layer in an airtight container with parchment or waxed paper in between each layer. Store in the fridge for 5-7 days.
Yes, Italian butter cookies can be frozen. I prefer to freeze the cookies plain and then decorate them when thawed. Layer in an airtight container and freeze for up to 3 months.
Serving Suggestions
Italian Butter Cookies are the perfect ending to any festive meal. Begin with Pasta Shells Stuffed with Ricotta, Italian Sausage Meatballs, and loads of Garlic Ciabatta Bread. Then enjoy these cookies with decadent Italian Hot Chocolate. It doesn’t get much better than that!
Related Recipes
Espresso and Hazelnut Biscotti
Orange and Almond Cookies
Italian Wedding Cookies Recipe
Snowflake Cookies
Made this recipe?
Please let me know if you liked it by leaving a ★★★★★ star rating and a review below. And remember to subscribe to my newsletter – it’s free!

Italian Butter Cookies Recipe
Equipment
- 1 Stand mixer or electric hand mixer optional but makes this recipe quicker and easier
- measuring cups and spoons (or scales)
- Wooden spoon and/or rubber spatula
- 1 Disposable piping bag
- 1 large (½-inch) open star piping tip Wilton Decorating Tip 8B, Loyal 6B, Ateco # 826 or similar
- 1 Cookie press if not using piping bag
- Assorted bowls and dishes as required
- 2-3 Baking sheets
Ingredients
- 1 cup (2 sticks/8oz/226 grams) unsalted European style butter (I use Lurpac brand) See Note 1
- ⅔ cup (130 grams) granulated sugar
- 2 egg yolks (Reserve one egg white to use if the dough is too dry)
- 2 teaspoons vanilla extract
- ¼ teaspoon almond extract optional
- 2¼ cups (280 grams) all purpose flour See Note 2
- ½ teaspoon baking powder
- pinch fine salt
Decorating Cookie Options (quantities will vary depending on how you decorate)
- candied cherries
- powdered sugar
- chocolate and chocolate chips
- colored sprinkles
- chopped nuts
- desiccated or shredded coconut
- Nutella or raspberry jam to fill cookie sandwiches
Instructions
Italian Butter Cookie Dough
- Even if you bake often, please take a moment to read the Notes and Tips for Success below before you begin. This dough is simple, but it relies on accurate measuring and good-quality ingredients. For the accurate results, spoon your flour into the cup and level it off, or, better still, use kitchen scales if you have them.Scooping flour straight from the bag packs too much into the cup. Extra flour makes the dough dry and difficult to pipe, and the extra pressure needed to squeeze it out warms the dough. Warm dough softens the butter, and once the butter softens, the cookies will spread and flatten in the oven. Using scales avoids this, but careful spoon-and-level measuring works well too.These cookies have been tested in a warm kitchen (around 83°F (28.4°C).A large (½-inch) open star piping tip is essential.
- Begin with cool room temperature ingredients. Butter should not be melting, greasy or shiny. It will still feel cool to touch and be pliable and easy to spread.
- Preheat the oven to 320°F/160°C and line two or three baking sheets with parchment paper. These can be baked at 350ºF (180ºC). If you've added egg white to make a soft dough, it is better to bake at 350ºF (180ºC).
- In a stand mixer, hand mixer, or even by hand thoroughly mix the butter and sugar thoroughly.
- Add the egg yolks, vanilla, and almond extract (if using). Beat until well combined and creamy. Don't overbeat the butter and sugar. Adding extra air to the dough can cause the cookies to flatten. I really don't worry one way or another. I've added this for those who say their cookies have flattened.
- Measure flour correctly (see step 1). Set aside ½ cup of flour. Sift or whisk the remaining flour, baking powder, and salt to combine.
- With the mixer on low, gradually add the flour mixture to the butter mixture. Add enough of the reserved flour so that the dough is firm but sticky. I usually add all of the reserved flour. Take care not to over-mix.
- If the dough is coming away from the sides and forming a ball, add some or all of the reserved egg white. I have revised the recipe and advise not to add milk.
- If using a cookie press, you will need to chill the dough for 30 minutes.
- Spoon ¼ of the dough into an extra large, heavy-duty piping bag fitted with a large (I use Wilton or Loyal 6B) open star tip. If using a cookie press, spoon the dough into the cookie press fitted with the desired cookie plate. (check manufacturer instructions).
- Pipe or press out cookies onto the prepared baking sheet. You can pipe the dough into a star, an "S" shape, a rosette, or a straight line. Holding the piping tip close to the baking sheet is the trick to getting good shapes. To form a simple star, hold the piping tip perpendicular and close to the baking sheet, twist the top of the bag to seal. Hold it at the top with the other hand at the bottom to guide. Squeeze from the top of the bag to create a star shape about an inch wide. Stop squeezing and pull the bag up to form a tip. Check the video for visuals.
- Continue filling the piping bag and piping cookies until the dough is used up.
- Before baking, you can press a chocolate chip or halved candied cherry into the middle of circular cookies.
- I never need to chill the cookies before baking. If you want to test it, place the baking sheets (after piping the cookies) in the refrigerator for 20-30 minutes before baking.
- Bake in preheated oven 10-15 minutes. The cookies should be a pale golden color. If you've made larger cookies, they may take 12-18 minutes until pale golden. If you prefer darker, crispier cookies, bake until golden brown all over.
- Cool for a minute or two on the baking sheet before moving to a cooling rack.
- In humid and wet weather, these cookies can absorb moisture and become soft, so store them in an airtight container in a cool place as soon as possible.
Decorating Cookies
- Cool the cookies completely before decorating.
- Sugar dusting – spoon a little powdered sugar into a small sieve and dust over each cookie.
- Chocolate dipped – Melt chocolate in a bowl over barely simmering water, stirring regularly until completely melted. Dip cookies in the chocolate, then set on parchment paper until set. Before the chocolate has set, you can scatter with colored sprinkles, chopped nuts, or coconut
- Cookie sandwiches – Spread a little Nutella, melted chocolate, or raspberry jam on the bottom of a cookie, then press a similar-sized cookie onto the filling to sandwich the cookies together. These cookie sandwiches can also be dipped in melted chocolate as above.
Notes
- Use the best butter you can find that has at least 82% fat content. High-quality butter contains less water. Butter with high water content may cause the cookies to spread. Butter should be slightly softened to combine easily and quickly with the sugar. It should NOT be melted.
- Be sure to measure correctly. Stir the flour to loosen before spooning it into measuring cups. The flour I use has 9.7% protein content, so it’s almost like cake flour. Alternatively, I highly recommend investing in a set of kitchen scales.
- It’s correct that the dough will be firm enough to push out of the piping bag. If impossible, add part or all of the reserved egg white.
- Don’t overfill the piping bag. When piping, apply pressure from the top.
- Have ingredients at room temperature.
- Scrape down the sides regularly when beating and mixing the dough.
- This mixture does not need to be chilled if using a piping bag and an open star tip. Please chill if using a cookie press.
- If you find the mixture is too moist, add a small spoonful of flour.
- Alternatively, if too dry, add some or all of the reserved egg white.
- When using a cookie press, sometimes the mixture gets stuck. Use a small knife or your fingers to release the cookies and place them on the baking sheet.
- Turn the baking sheets in the oven for even baking.
- Cool completely before decorating.
Nutritional Estimate Per Serving
Nutritional Disclaimer
Nutritional information is an estimate provided by an online nutrition calculator. For accurate results, it is recommended that the nutritional information be calculated based on the ingredients and brands you use.
This updated and improved recipe was first published here on Marcellina in Cucina on December 18, 2018.
Followed directions. Way too stiff to pipe. My husband couldn’t even do it. Yes, we added the extra egg white to no avail.
Cristina, this usually happens because the flour was not measured correctly. It’s strange to me that I just received your comment and then Jodie and Akane’s comments who both loved these cookies. Please bakers, measure your flour correctly!
I’m about to try this recipe but was wondering, can I used powdered sugar? Or do you recommend using the granulated sugar?
Madhuri, I have only ever used granulated sugar for my recipe. You could try powdered sugar but I can’t predict the results.
LOVE everything I’ve tried!! One of my favorite sites!
Thank you, Theresa! I really appreciate you taking the time to let me know!
these came out fantastic! for years I’ve always wanted to try to make these cookies. and I decided after reading all your instructions to go ahead and take a crack at it. I was nervous mixing the butter at first. and then I became nervous again when I was piping them out. I made sure the room was warm okay actually a little hotter than warm but to say that I made these cookies and they look like they came out of the bakery All I can do is say thank you thank you thank you thank you thank you! Happy holidays everyone!!
Kym, I’m thrilled that you loved these. I’m even more thrilled that you are such a careful baker and took time to follow the instructions to the letter! Thank you for taking the time to let me know of your experience and write such a complete review. Happy holidays!
Just made these cookies for the first time today. I am familiar with these types of cookies from bakeries in Brooklyn, NY. I liked this recipe because the ingredients are simple and the instructions were clear and easy to follow. I needed to use a bit of the egg white to thin out the dough and I was able to pipe it out. They came out amazing for my first time! Pressed two of them together with raspberry jelly and then dipped them in chocolate and sprinkles. I got almost 35 total cookies after I was done decorating. Great recipe! Love it!
That’s what I love about these cookies, too, John! The ingredients are simple and are usually on hand. Thank you for the thorough review and taking the time to come back to comment. I really appreciate it!
Just made these and they turned out absolutely perfect! I was worried because of all the problems experienced by other bakers, but after following the instructions precisely as written, they were very quick and easy to make! Thank you so much for posting this recipe!
Toni, I’m thrilled that these cookies turned out absolutely perfect! Thank you for taking the time to let me know. I have tried to work out what is happening with some of my readers and have tested and retested this recipe countless ways and it always turns out well. I’m glad it did for you too!
I’ve made these twice. The first time they were flat and spread and I measured everything on a kitchen scale. The second time I made these they were perfect!!! My advice to anyone making these is don’t do what I did the first time I made these. READ Every word in directions and notes. I creamed the butter and sugar like I was making a cake because I didn’t read the notes and major fail! Thanks for a great recipe!
Marie, thank you so much for taking the time to comment. What do you think made your cookies flat and spread the first time? I’d really like to help everyone made amazing cookies. I have just finished testing this recipe again at a higher temperature with a whole egg plus an egg yolk. Still perfect. I can’t get these cookies to not work. I’d love to know what is creating the problem.
Wah, waaaaah. I used the paddle attachment on my mixer to try to keep from incorporating too much air. I used my scale to weigh all of the ingredients. The dough was WAY too stiff to pipe, so I had to add 2 TBSP of milk. I refrigerated the piped cookies for 45 minutes before baking and the still spread like crazy. Bummer.
Thanks for taking the time to share your experience. I want to clarify a few points for anyone else reading because this recipe has been tested many times, including with U.S. ingredients and a conventional oven, and I haven’t been able to reproduce the issues some readers mention.
A very stiff dough and excessive spreading are actually opposite problems, which usually points to ingredient differences rather than the method. When the dough is too stiff, that often means there is too much flour or the type of flour is absorbing more moisture. Different brands of flour can settle differently, and lower-quality butter or flour can behave unpredictably. Adding liquid will change the structure of the dough which then leads to spreading in the oven.
I haven’t found refrigeration necessary when the dough is made as written. I’ve tested piping immediately, after resting, and after chilling, and the results are consistent when the ingredients match the recipe.
For best results, use good-quality butter and flour, be sure the butter is at a cool room temperature, and follow the recipe quantities. Adding milk will make the dough spread. I have never needed to add milk. If the dough is extremely stiff before piping, that is a sign the flour or butter used is absorbing differently than expected.
Why not email me with the ingredients you have used and photos of the dough, the piping tip and bag you’ve use and anything else you think might be helpful. I’d love to get to the bottom of this. It’s very strange that some readers have such wonderful success with this recipe as I do and a few as having issues.
I hope this helps anyone else troubleshooting at home. The recipe should pipe smoothly and hold its shape beautifully when the ingredients and method are aligned.
Recipe definitely needs tweaking,here in the us oven needs to be at 350. They need to be chilled, they spread if they’re not chilled. The flavor is too eggy, reduce to 1 whole egg instead of 2 yolks, they are very hard to pipe with arthritic hands, so for older folks I would scoop and use a decorative cookie press.
Thanks for sharing your thoughts, Laura. I do want to clarify a few points for other readers because this recipe has been tested extensively, including multiple times with U.S. ingredients and a conventional (non-fan) oven.
The correct temperature for this recipe is 320°F (160°C). You are welcome to bake at 350°F if you prefer a darker cookie, but that is not how this recipe is formulated and the cookies will brown much faster. Chilling is also not required when the dough is made as instructed. I’ve tested this recipe repeatedly — chilled, rested, and baked immediately — and found no meaningful difference in spread.
One thing I do want to stress is that ingredient quality matters. Inferior ingredients can lead to poor results. I know because it’s happened to me. One thinks that butter is just butter but it’s not. Please use the absolutely best quality. The same goes for how the flour is measured. Cookies that spread usually indicate too little flour or butter that is too soft, not a flaw in the recipe.
These cookies must be piped with an open star tip that is half an inch in diameter. Using a closed star tip or a smaller size will make the dough harder to pipe. This is explained in the instructions because the correct tip is essential for ease and definition.
Regarding the flavor, two yolks are traditional and provide the richness and tender texture expected in Italian butter cookies. Changing this to one whole egg produces a different result, which is fine as a personal adaptation, but it is not the same recipe and doesn’t reflect how this one is meant to taste or perform.
Anyone who finds piping difficult due to hand issues can certainly scoop or use a cookie press and I state that in the recipe that a cookie press can be used. That’s a practical adjustment for individual needs, not something the recipe itself requires.
Many readers in the U.S. and worldwide make these cookies successfully, so the recipe is sound as written. Thank you again for taking the time to comment.
I’m in the US and baked them at 325 no chilling. Came out perfect!
Thank you, Marie! Yes, absolutely no chilling. I have just finish testing that. I chilled the cookies and baked at 350ºF (180ºC) and found that they over cooked on the edges. I was coming to my website to remove the cup measurements because that may be what’s tripping people up.
Sorry about that, the correct amount to replace is 45g not 5g. You need to replace 45 g of AP flour with cornstarch to reduce the Protein content to 9.7
Jacqueline, I’m so happy that you were able to correct the flour and achieve delicious results! Yes, these cookies should be exactly as you described – buttery, delicate, light and melt in your mouth! Thank you for taking the time to let me know about what you did and how much you loved them.
Love this recipe, except I couldn’t find 9.7% flour so had to make it by removing 5g AP flour and replacing with 5g cornstarch. I tried rice flour but it did work as well. After that, it worked like a charm, followed your reciped exactly and they came out absolutely perfect. Buttery, delicate, light and melt in your mouth!!! Thank you!
I did the recipe exactly how it was written reading every note that was specified. the dough would not go through the cookie press then I switched to a piping bag and it was still so difficult. I chilled the finally formed cookies so they wouldn’t loose their shape. They turned out horrible. Flat and gross. what a waste of time! I’m a very experienced baker. I’ll be throwing this recipe away
Nancy, thank you for giving the recipe a try. When the dough is extremely hard to press or pipe and the cookies bake flat, it usually means the butter softened too much during mixing or handling, or that a little extra flour has been packed into the cup. Both of these things can happen even when the recipe is followed closely.
In Step 6 and Step 7 I ask readers to reserve some of the flour and only add enough to keep the dough firm but still slightly sticky. If all the flour is added at once, or if it’s scooped rather than spooned into the cup, the dough becomes dense and difficult to squeeze out. Once the dough is wrestled with, the warmth from your hands softens the butter and the cookies lose their structure in the oven.
Using kitchen scales helps prevent this, and even chilling the piping bag briefly can keep the butter at the right consistency. I’ve tested this recipe many times and also filmed a video so you can see exactly how the dough should look before piping. I hope these tips help if you decide to try again.
Just wasted an hour of my time trying to make these and had same issues, Nancy. Such a bummer as the pictures were great, but after reading over the comments, following directions carefully and not allowing butter to get too soft and checking to make sure I didn’t use too much flour, mine wouldn’t go thru the press or the piping bag, then the tiny bit I did get thru just melted. Don’t want to deal with this again and overcomplicate recipes further.
Hello John,
Thank you for sharing your experience. I understand it’s disappointing when a recipe doesn’t behave the way you expect.
I’ve have just retested this recipe very thoroughly using U.S. ingredients, including butter at 80.2 percent fat, flour matched to the protein level of King Arthur all-purpose, and U.S.-style granulated sugar. I did not add any extra milk and held a little of the flour back. I also baked in a conventional oven (not convection) and worked in a warm kitchen. In every test, the dough piped normally through an open star tip and the cookies held their shape well.
What you describe — dough that feels too stiff to pipe but then “melts” in the oven — may come from working in a much cooler room. My kitchen was around 83°F (28.4°C) during testing, while many winter kitchens sit closer to 65–70°F (18–21°C) or even colder. That difference alone can make the butter behave very differently. In a cool kitchen, the butter stays firm so the dough can feel stiff, but once in the oven the butter melts faster than the structure sets, which makes the cookies appear to lose their definition. Even small changes in room temperature, butter consistency, or how the flour is measured can affect this style of cookie.
Many readers ( in the U.S. and worldwide) make these cookies successfully, so the recipe itself is sound, but without being in your kitchen it’s difficult to pinpoint exactly what happened for you.
I hope this helps if you decide to try them again.
Can you share what brand and type of flour you use? I usually use King Arthur, but their pastry flour is only 8% protein. Their cake flour is 10% protein so it would see closer to what you use. I have been trying to fine the recipe for years that I remember as a girl. This looks like it would be very close.
Diane, the brand I use is White Wings but that won’t be available in your country. King Arthur cake flour is the closest and I think will work well. The best advise I can give you for this recipe is to measure the flour carefully. If you have kitchen scales, that’s the best way. When using cups, it’s very easy to pack the flour and end up with too much resulting in dry dough. Watch my video for extra tips. Let me know if you have any other questions. I hope you find the recipe you’re looking for!
This will be my first time, baking the Italian cookies. I read all your notes and tips. Thank you very much. I will let you know how it comes out. Thank you so much. I appreciate you.
Thank you, Carmen. Let me know if you have any questions that I can help you with.
Made these with my 3yr old and they came out very well. We enjoyed them very much. I am definitely keeping this receipe and making these again. Thank you.
That’s wonderful, Cynthia! Nothing like the memory of baking with your darling mother. What a special gift you give to your child.
Can you use cake flour?
Doreen, I’ve never made these with cake flour. The texture would definitely be different and you may need to add more cake flour to make the cookies pipeable. I think it would need to be tested. I’ll do that and add notes into the recipe when I do.
can I store these cookies in the freezer?
Yes, these can be stored in the freezer. When thawed, these cookies may have lost their freshness. If that’s the case, simply refresh in a 300ºF/150ºC oven for 5-10 minutes.
Amazingly consistent, easy to follow recipe! Every time I make these, they taste like my nonna’s. ¡Fantástico!
What a lovely comment—thank you! I’m so happy to hear the recipe reminds you of your nonna’s—there’s no higher praise. I’m thrilled it’s become such a reliable favourite for you. Grazie mille!
I just made these cookies into Italian Leaf cookies and they came out phenomenal! The recipe is exactly right. For strawberry batches, I subbed 1 tsp strawberry extract + 1 tsp vanilla. For pistachio batches, I subbed 1 tsp pistachio extract + 1 tsp vanilla. Have fun!
I’m so glad to hear you enjoyed the cookies—and your flavor variations sound absolutely delicious! I’m intrigued that you were able to shape them into leaf cookies, as the dough is quite soft and meant for piping. It’s wonderful to see how creative bakers can adapt the recipe. Thanks for sharing your tips!
The taste of these cookies are fabulous. I do not like almond extract so I substituted it for Caramel Bakery Emulsion and you only need a 1/4 – 1/2 tsp to carry the flavor. I doubled the recipe because I wanted a lot of cookies. The recipe is very detailed so after looking at the protein content used I decided to use 1/2 cake flour and 1/2 all purpose flour. It also recommended to withhold some flour and I did as instructed. I withheld approximately a couple tablespoons of flour for each batch. The dough is extremely hard to pipe and I am going to thin it out with a little milk as suggested in the recipe’s notes. I used a cookie cutter for some and also pushed it through a tip with my hand for some too but both of these options are not ideal. I would recommend this recipe based on the yummy taste of the cookies and if I thin the batter and can pipe the dough it will be perfection;) I posted some pics on my Instagram account. Please check the pictures out at TJlooker1 and an eye out for more creations utilizing your recipes because I am definitely making more soon. Thank you💖
I’m glad you were happy with this recipe.